阿里云 SSL 免费证书使用
目录
1 申请
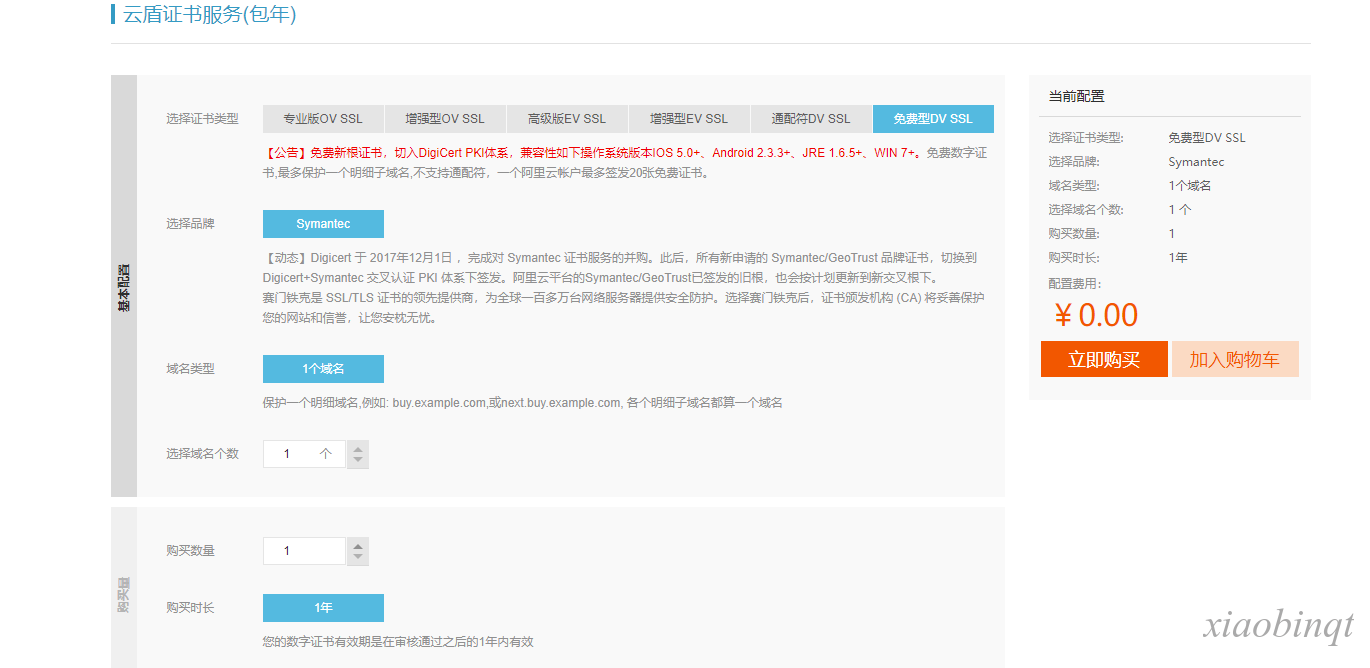
证书申请地址
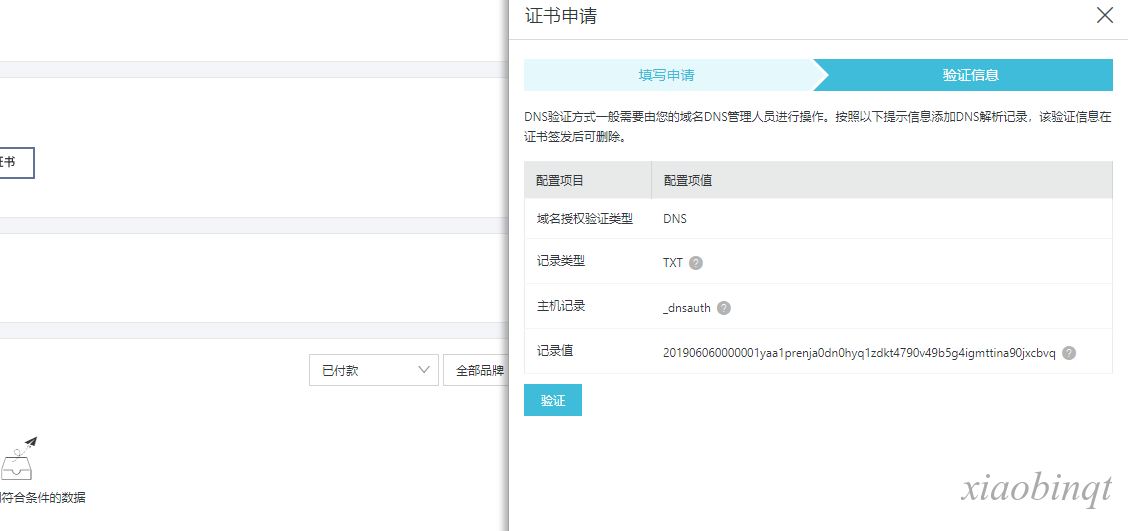
申请完成页面
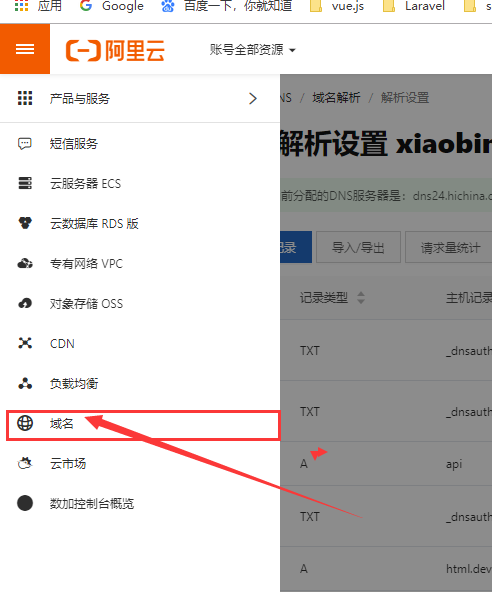
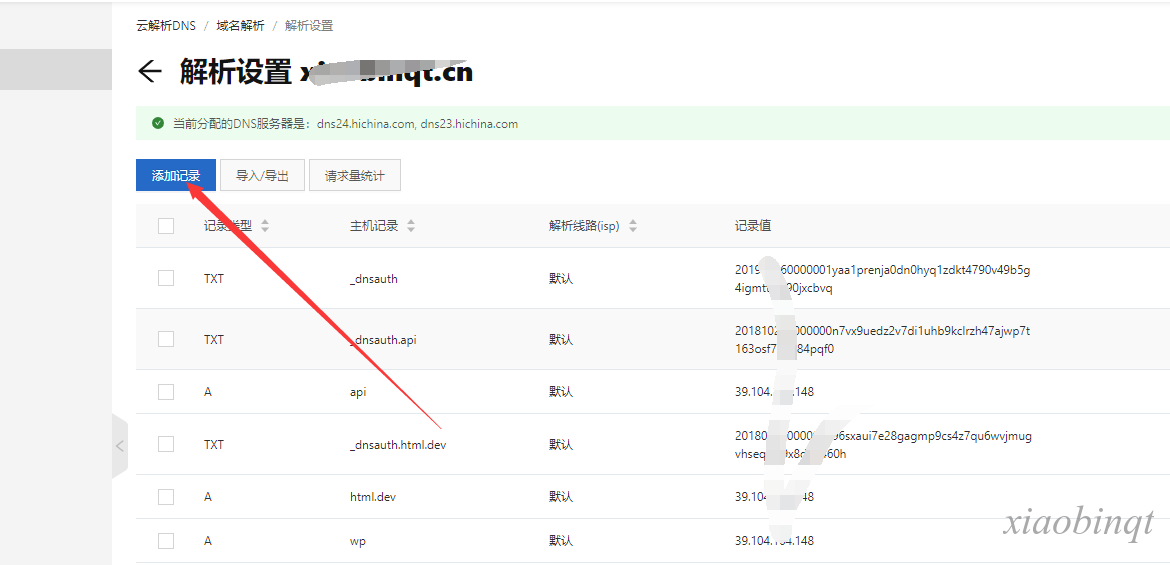
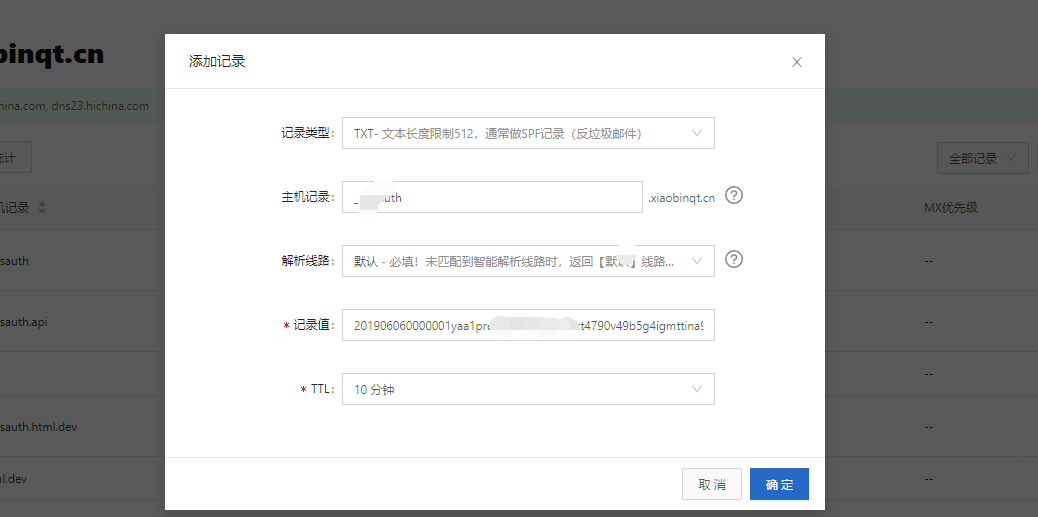
将主机记录解析
将主机记录和记录值填写
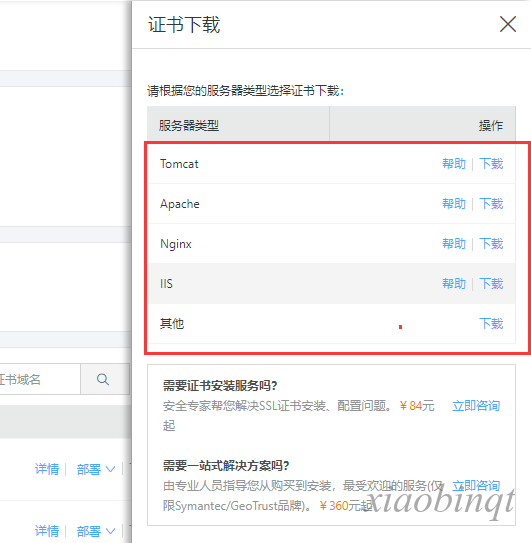
解析成功后下载证书
我用的是 Apache ,所以下载的是 Apache
2 上传证书
由于本人使用的是 apache ,以下配置是 apache 的通用配置,具体可参看官方 文档
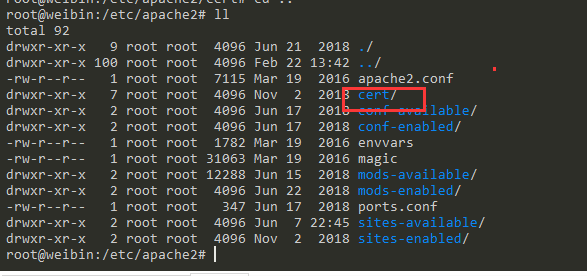
在 apache 的路径下新建一个 cert 目录,其实该目录建在哪里都可以,但是放在 apache 下方便管理。
在 cert 目录下可以建不同的文件夹放在不同域名或子域名的 ssl 文件。
把我们刚才下载的证书上传到服务器上
3 配置
这是基本的配置语句
# 添加 SSL 协议支持协议,去掉不安全的协议
SSLProtocol all -SSLv2 -SSLv3
# 修改加密套件如下
SSLCipherSuite HIGH:!RC4:!MD5:!aNULL:!eNULL:!NULL:!DH:!EDH:!EXP:+MEDIUM
SSLHonorCipherOrder on
# 证书公钥配置
SSLCertificateFile cert/a_public.crt
# 证书私钥配置
SSLCertificateKeyFile cert/a.key
# 证书链配置,如果该属性开头有 '#'字符,请删除掉
SSLCertificateChainFile cert/a_chain.crt
我们将默认的配置 copy 一份出来,取一个跟域名有关的文件名
cp /etc/apache2/sites-available/000-default.conf /etc/apache2/sites-available/www.xiaobinqt.cn.conf具体配置可参考
<VirtualHost *:80>

      ServerName www.xiaobinqt.cn
      Redirect permanent / https://www.xiaobinqt.cn/
</VirtualHost>

<VirtualHost *:443>
     SSLEngine On
        # 添加 SSL 协议支持协议,去掉不安全的协议
SSLProtocol all -SSLv2 -SSLv3
# 修改加密套件如下
SSLCipherSuite HIGH:!RC4:!MD5:!aNULL:!eNULL:!NULL:!DH:!EDH:!EXP:+MEDIUM
SSLHonorCipherOrder on
# 证书公钥配置
SSLCertificateFile cert/xiaobinqt.cn/2324042_www.xiaobinqt.cn_public.crt
# 证书私钥配置
SSLCertificateKeyFile cert/xiaobinqt.cn/2324042_www.xiaobinqt.cn.key
# 证书链配置,如果该属性开头有 '#'字符,请删除掉
SSLCertificateChainFile cert/xiaobinqt.cn/2324042_www.xiaobinqt.cn_chain.crt
    # etc
ServerName www.xiaobinqt.cn
     ProxyPreserveHost On
     ProxyRequests Off
     ProxyPass / http://localhost:30007/
     ProxyPassReverse / http://localhost:30007/
</VirtualHost>
我用的是 docker 服务,如果你的只是项目文件夹可以参考这样配置
<VirtualHost *:80>
        # The ServerName directive sets the request scheme, hostname and port that
        # the server uses to identify itself. This is used when creating
        # redirection URLs. In the context of virtual hosts, the ServerName
        # specifies what hostname must appear in the request's Host: header to
        # match this virtual host. For the default virtual host (this file) this
        # value is not decisive as it is used as a last resort host regardless.
        # However, you must set it for any further virtual host explicitly.
        #ServerName www.example.com

        #ServerAdmin webmaster@localhost
        ServerName www.xiaobinqt.cn
        DocumentRoot /var/www/html
        Redirect permanent / https://www.xiaobinqt.cn/

        # Available loglevels: trace8, ..., trace1, debug, info, notice, warn,
        # error, crit, alert, emerg.
        # It is also possible to configure the loglevel for particular
        # modules, e.g.
        #LogLevel info ssl:warn

        ErrorLog ${APACHE_LOG_DIR}/error.log
        CustomLog ${APACHE_LOG_DIR}/access.log combined

        # For most configuration files from conf-available/, which are
        # enabled or disabled at a global level, it is possible to
        # include a line for only one particular virtual host. For example the
        # following line enables the CGI configuration for this host only
        # after it has been globally disabled with "a2disconf".
        #Include conf-available/serve-cgi-bin.conf
</VirtualHost>

<VirtualHost *:443>
     SSLEngine On
        # 添加 SSL 协议支持协议,去掉不安全的协议
SSLProtocol all -SSLv2 -SSLv3
# 修改加密套件如下
SSLCipherSuite HIGH:!RC4:!MD5:!aNULL:!eNULL:!NULL:!DH:!EDH:!EXP:+MEDIUM
SSLHonorCipherOrder on
# 证书公钥配置
SSLCertificateFile cert/xiaobinqt.cn/public.pem
# 证书私钥配置
SSLCertificateKeyFile cert/xiaobinqt.cn/214792197160511.key
# 证书链配置,如果该属性开头有 '#'字符,请删除掉
SSLCertificateChainFile cert/xiaobinqt.cn/chain.pem
    # etc
     ServerName www.xiaobinqt.cn
</VirtualHost>
以上配置全部基于 apache,如果你用的不是 apache,以上配置可能不适合你。关于 apache 服务的一些其他知识可以参考这篇 文章 https://www.linode.com/docs/web-servers/lamp/install-lamp-stack-on-ubuntu-16-04/,该文章可能需要翻~墙访问. 配置完成后重启服务,可以利用 curl 命令查看是否配置成功.
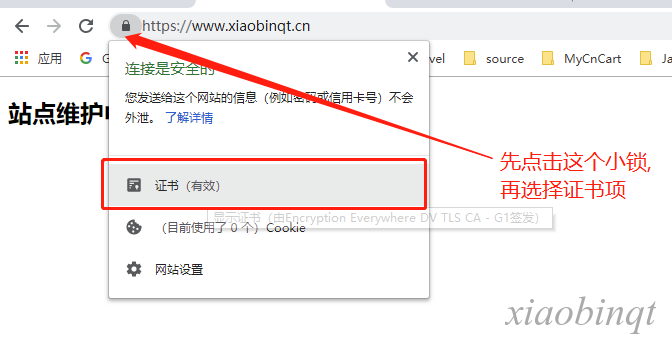
curl -I localhost:xxx对于 ssl 是否配置成功可以通过浏览器查看:
可以看到这是我们最新申请的一年的 ssl 证书:
